
Professionals rely on systematic methods to test a relay efficiently and accurately. A relay is an essential electrical switching component used in many systems to control circuits safely. When it fails, it can lead to performance issues or system interruptions. Experts follow a structured approach that ensures safety, precision, and reliability while diagnosing relay conditions. By using simple tools and step-by-step checks, they can quickly determine whether a relay is functioning correctly or needs replacement.
Understanding Relay Basics
Professionals begin by understanding how a relay operates before testing it. A relay uses an electromagnetic coil to open or close contacts, allowing low-power signals to control higher-power circuits. Knowing this principle helps technicians interpret test results accurately. Training on how to check a relay enhances technical skills. They identify coil terminals, contact points, and switching behavior to ensure proper evaluation. This foundational step reduces errors and improves testing efficiency.
Visual Inspection and Safety Check
First, professionals perform a careful visual inspection to detect physical damage or wear. This step ensures safety before electrical testing begins.
Key checks include:
- Inspecting for cracks, burns, or corrosion
- Checking for loose or bent terminals
- Ensuring the relay is clean and properly mounted
- Verifying there is no overheating damage
A quick visual review often reveals obvious faults and prevents further complications. Safety precautions are always followed, including disconnecting power before handling the relay. This step ensures a safe and reliable testing process.
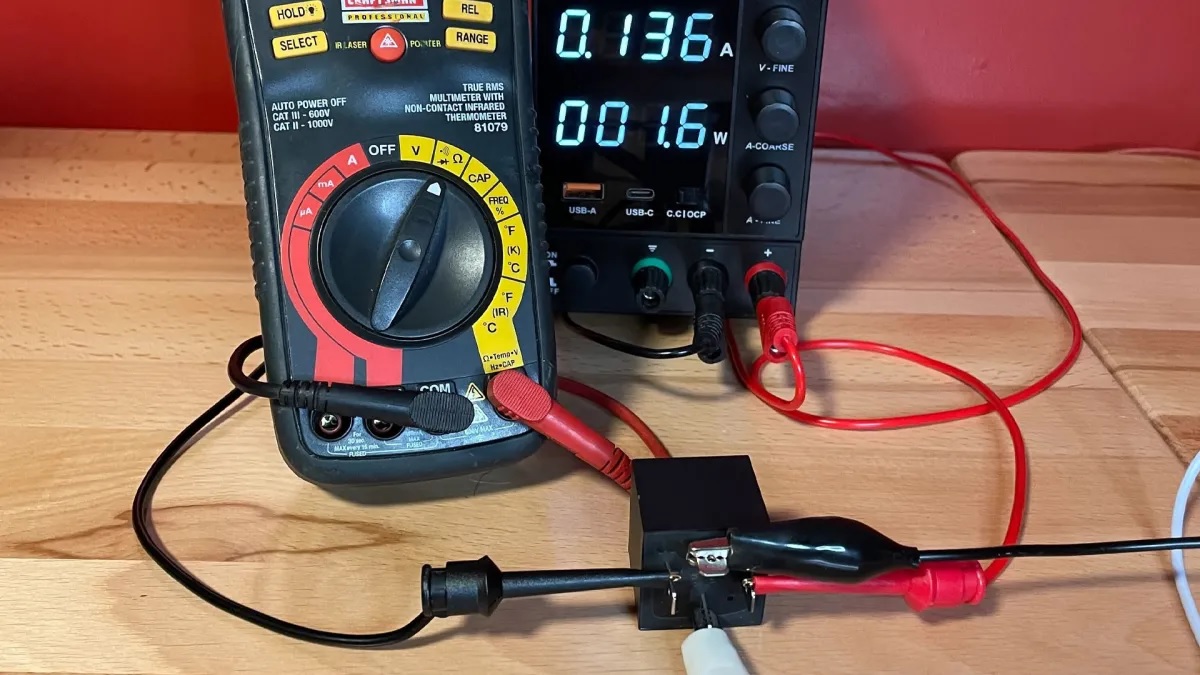
Coil Testing with Multimeter
Professionals then test the relay coil using a multimeter set to resistance mode. This helps determine whether the coil is intact and capable of generating a magnetic field. A correct resistance reading indicates proper coil health, while an open or infinite reading suggests a fault.
Steps include:
- Setting multimeter to resistance mode
- Placing probes on coil terminals
- Observing resistance values for consistency
- Comparing readings with expected functional range
If the coil passes this test, it confirms that the relay can activate correctly when energized. This step is crucial for identifying internal electrical issues.
Contact Testing and Switching Function
Next, professionals evaluate the relay’s contact switching performance to ensure proper circuit control. This involves applying a controlled input to activate the relay and observing whether the contacts open and close smoothly. Consistent switching confirms reliable performance under operating conditions.
Key checks include:
- Verifying normally open and normally closed contacts
- Checking for smooth switching action without delay
- Ensuring minimal resistance across closed contacts
- Testing response under repeated activation
Proper contact function ensures the relay can safely manage electrical loads. Any irregular switching behavior indicates potential wear or internal damage requiring attention.
Final Verification and Professional Tips
Professionals conclude the testing process with a final verification step to ensure overall relay reliability. This includes rechecking coil response, confirming contact stability, and validating consistent performance under repeated cycles. A properly functioning relay should operate smoothly without noise, delay, or irregular behavior. Experts also recommend maintaining clean terminals and ensuring secure connections for long-term efficiency. Regular testing helps prevent unexpected system failures and improves operational safety. By following structured testing methods, professionals achieve accurate diagnosis and dependable results, ensuring that electrical systems continue to perform at optimal levels with high efficiency and reliability.
